
Documentation Index

Fetch the complete documentation index at: https://dripart-docs-cloud-mcp-partner-generate-oauth.mintlify.app/llms.txt

Use this file to discover all available pages before exploring further.

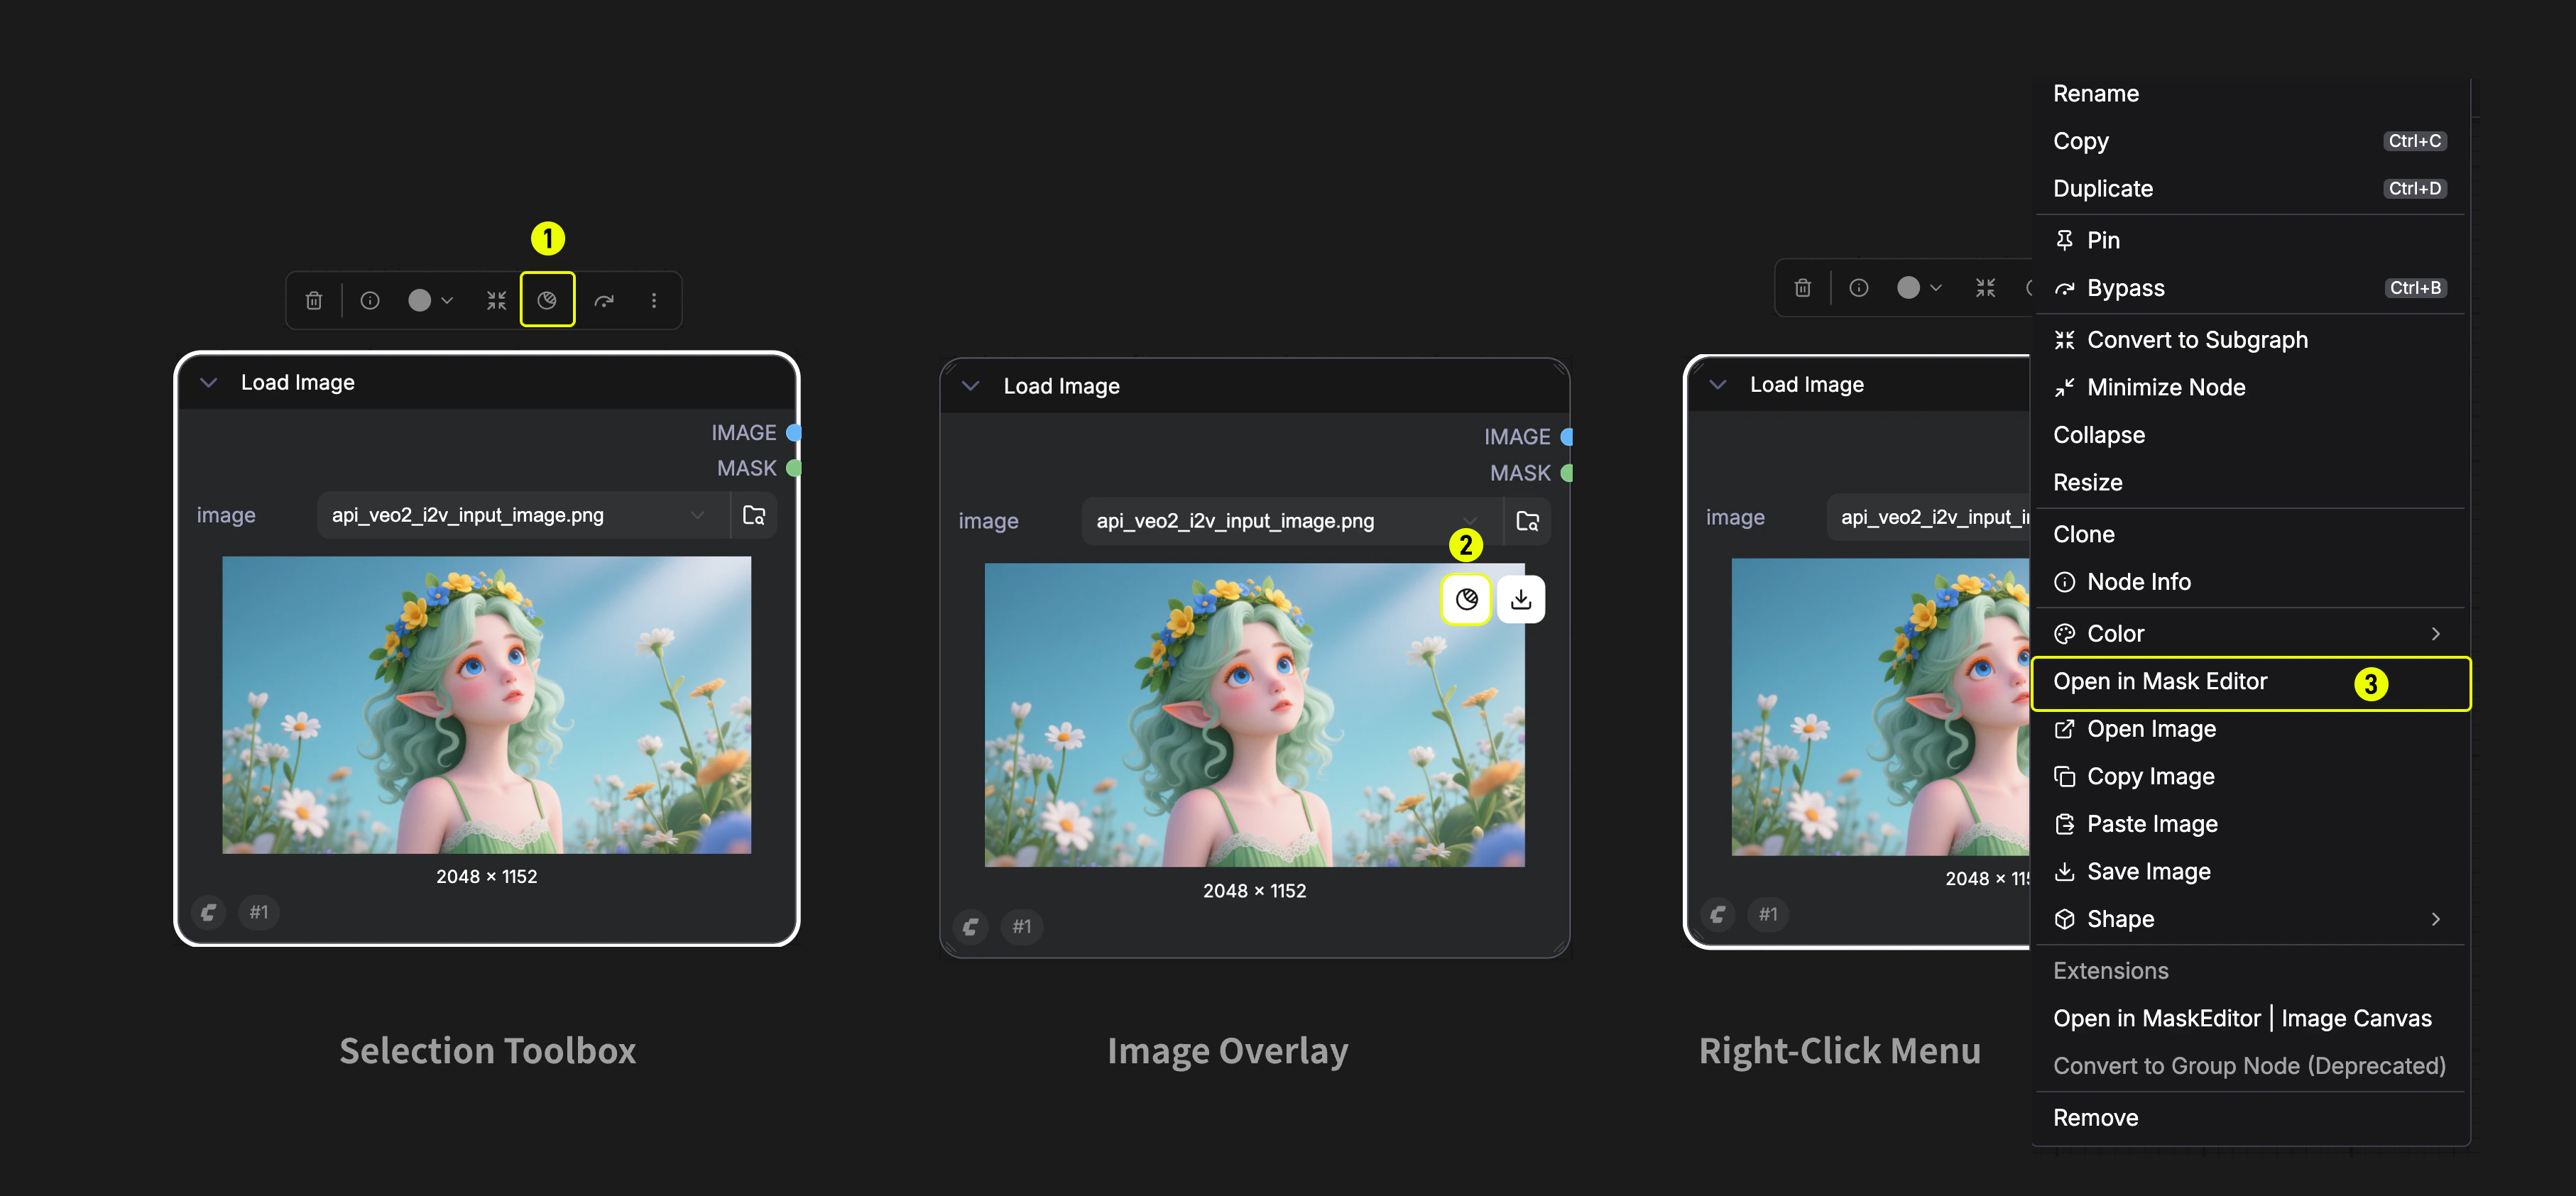
The Mask Editor is a built-in tool in ComfyUI that lets you create and edit masks directly on your images — no external image editor needed. It supports multiple drawing tools, layer management, undo/redo, canvas transformations, and GPU-accelerated brush rendering.

How to Open

There are three ways to open the Mask Editor:
  1. Selection Toolbox — Select a Load Image node, then click the Mask icon button in the selection toolbar above the node.
  2. Image Overlay — Hover over the image preview (gallery mode), then click the Edit or mask image button (mask icon) that appears in the top-left corner.
  3. Right-Click Menu — Right-click a Load Image node and select Open in Mask Editor from the context menu.
The Mask Editor is available in both Graph Mode and App Mode.
Three ways to open the Mask Editor: Selection Toolbox, Image Overlay, and Right-Click Menu

Interface Overview

Mask Editor main interface with tool panel, canvas, and settings side panel The Mask Editor opens as a modal dialog with four main areas:
#AreaLocationDescription
1Top BarTopHeader with undo/redo, canvas transforms, invert/clear, save/cancel
2Tool PanelLeftTool selection and zoom info
Pointer ZoneCenterThe main canvas area for drawing and editing
3Side PanelRightTool-specific settings and layer controls

Tools

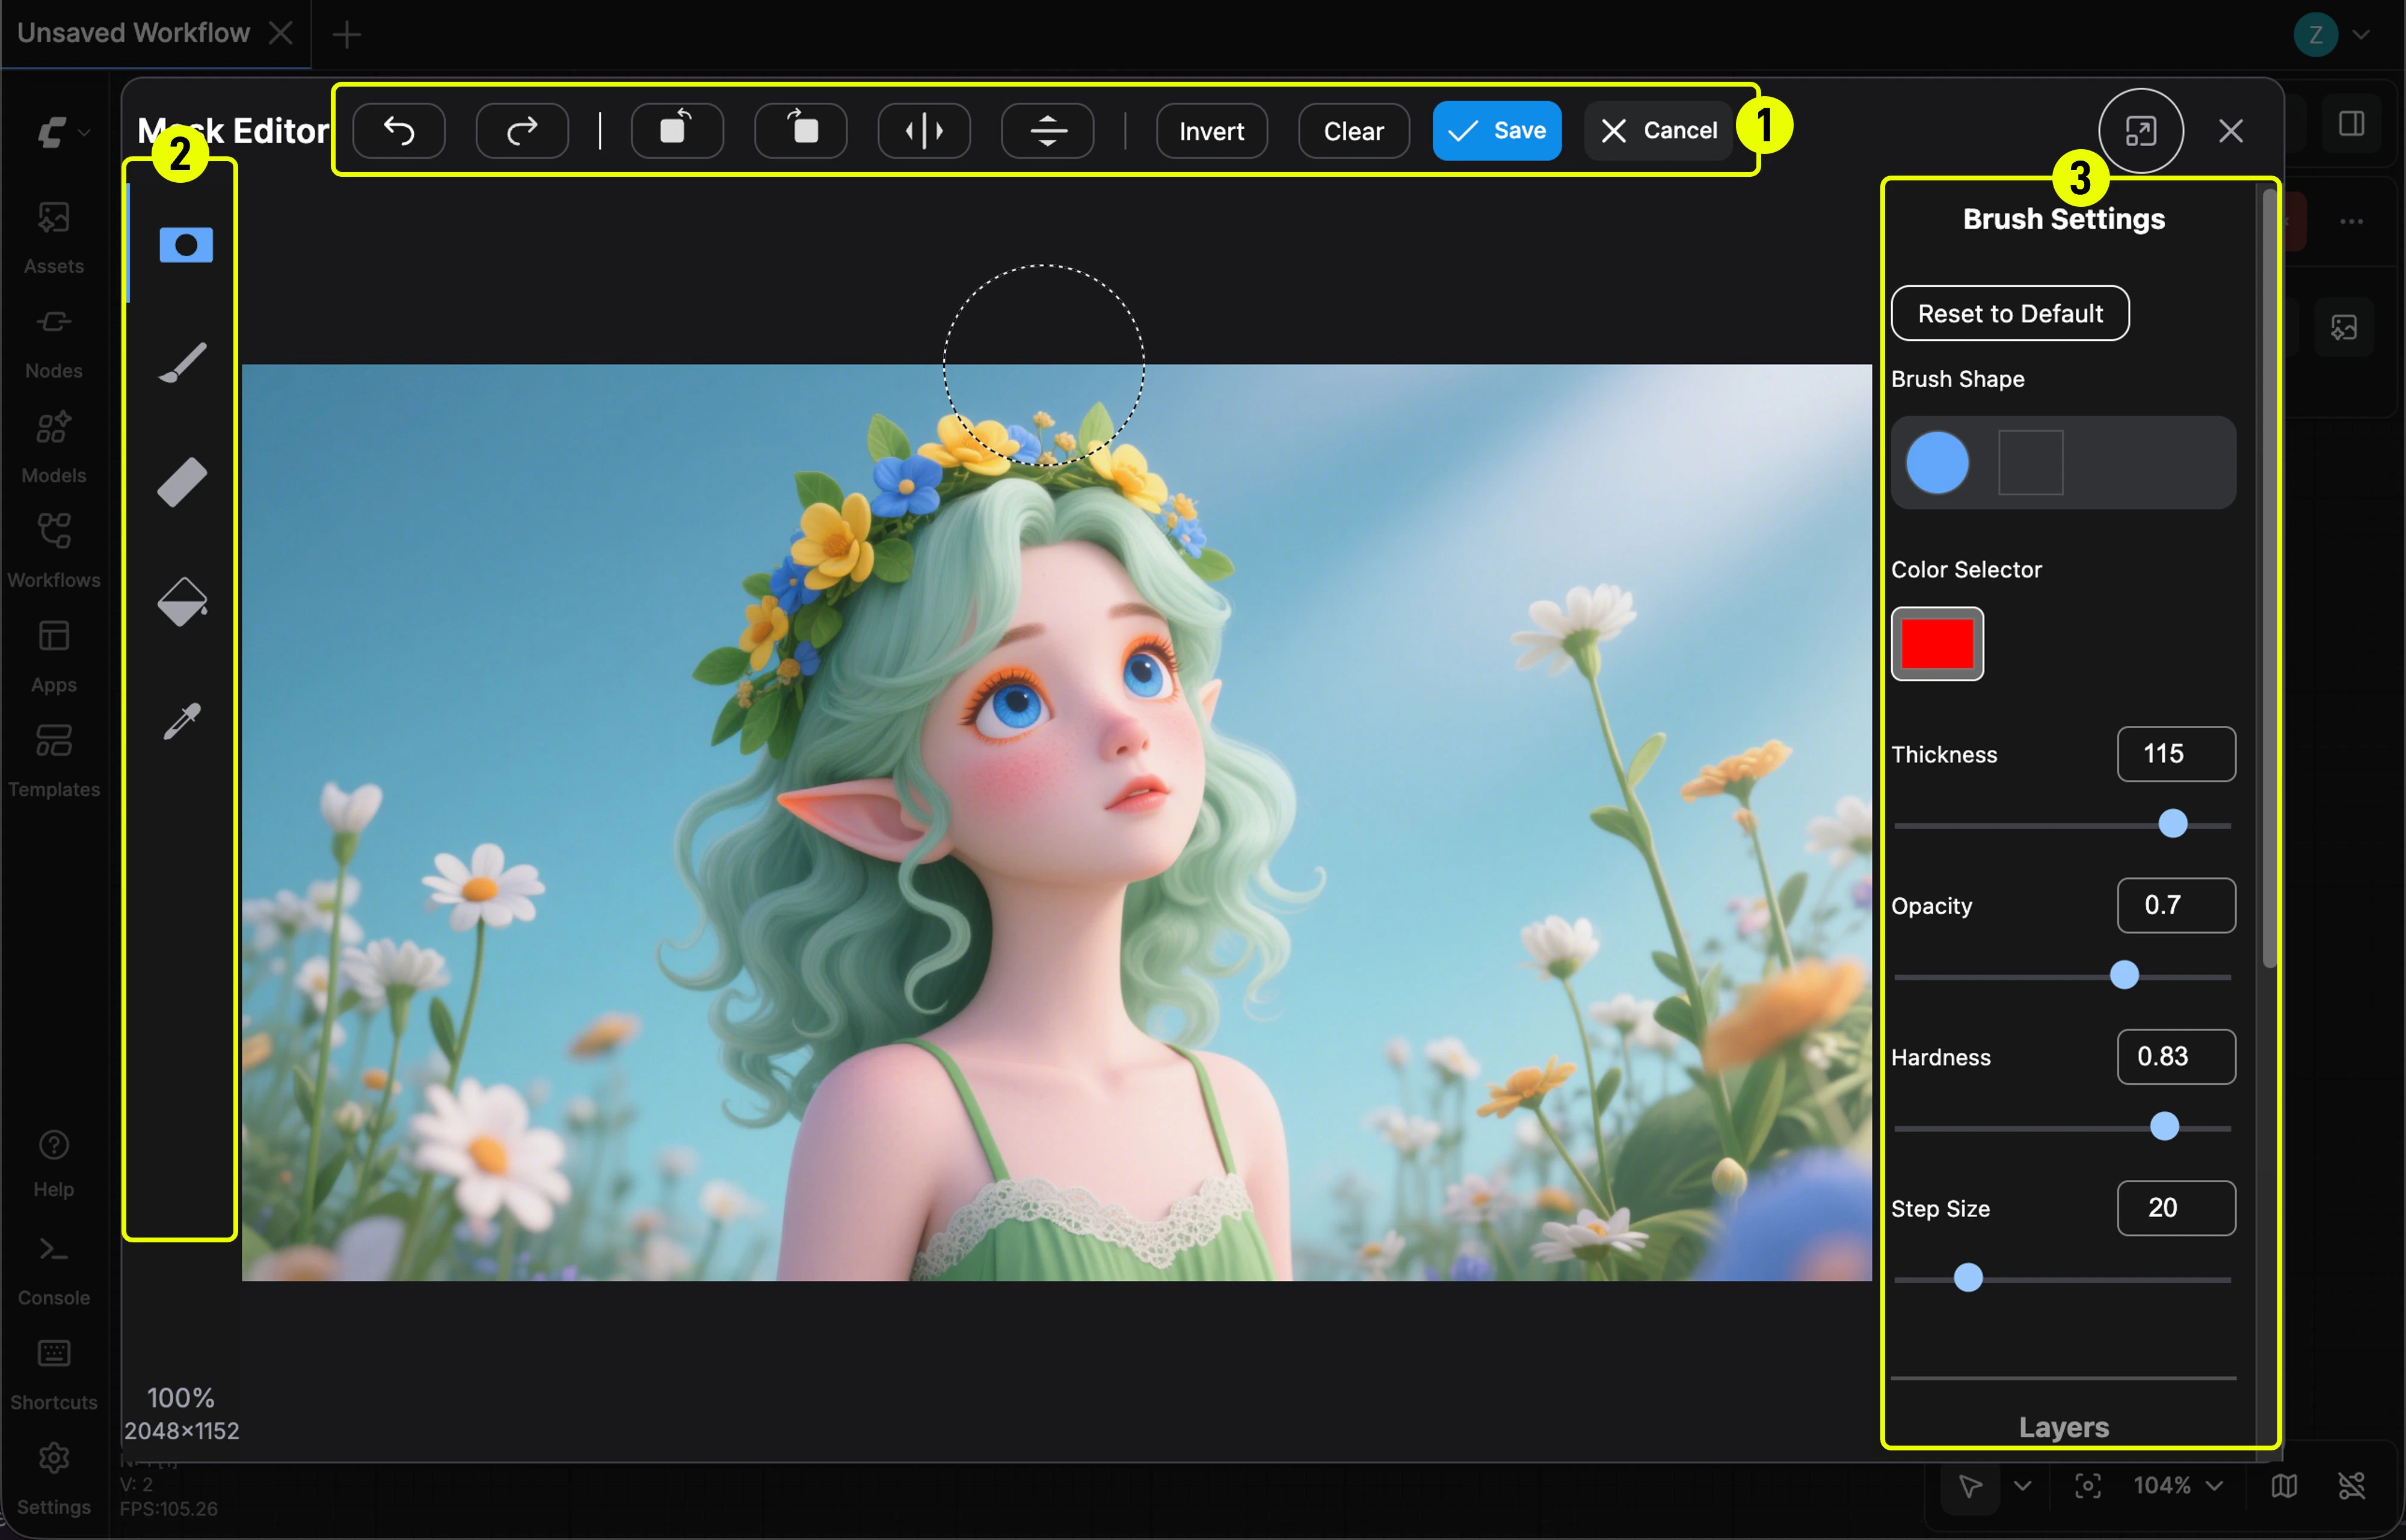
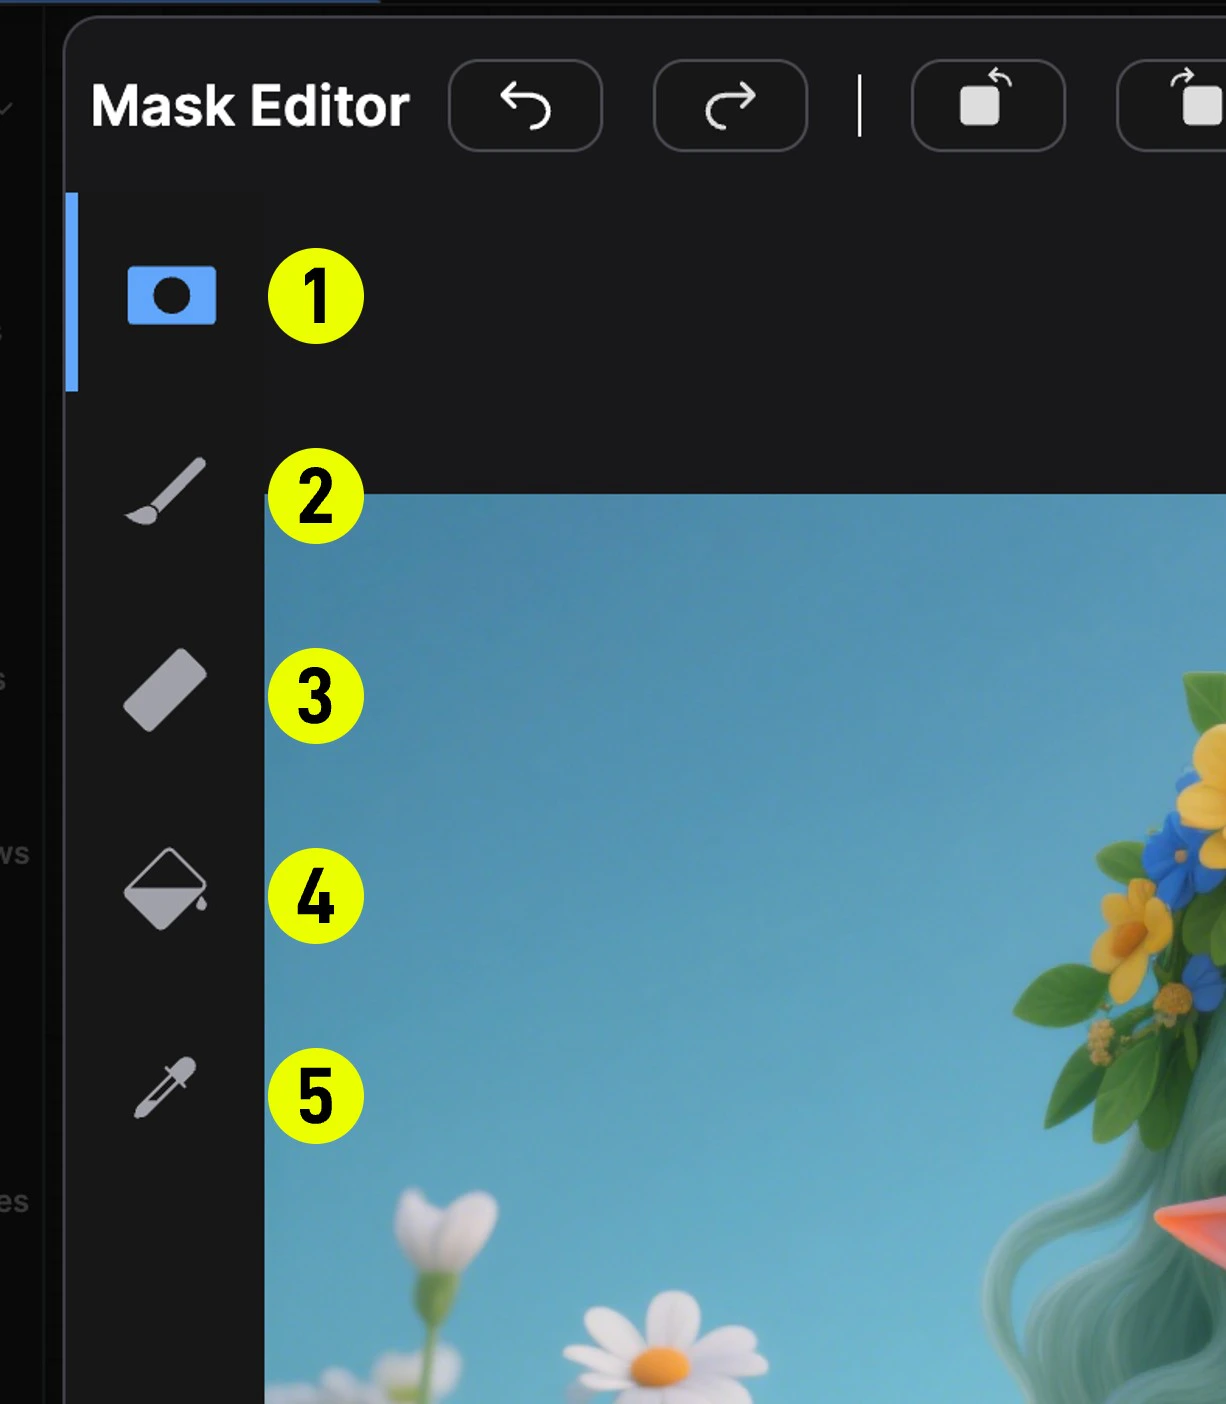
The tool panel on the left side offers five tools. Select a tool to activate it, and the right panel will show its settings. Mask Editor tool panel with 5 numbered tools
#ToolLayerDescription
1Mask PenMaskPrimary tool for drawing mask regions. Left-click and drag to paint mask on the image.
2Paint PenRGB (Paint)Paint directly onto the image’s RGB layer. Useful for inpainting or touching up the base image.
3EraserMask / RGBErase parts of an existing mask or paint layer.
4Paint BucketMaskFlood-fill tool based on color similarity. Click a pixel to fill the connected region with a mask; click an already-masked area to erase from the mask. Tolerance controls how broadly the fill spreads.
5Color SelectMaskSelectively mask all pixels matching a target color, with advanced matching algorithms (Simple HSL / LAB).

TopBar Actions

Mask Editor TopBar actions labeled 1–10 The top bar provides canvas-wide operations:
#ActionDescription
1Undo (Ctrl+Z)Revert the last action
2Redo (Ctrl+Shift+Z / Ctrl+Y)Reapply a reverted action
3Rotate LeftRotate all layers 90° counter-clockwise
4Rotate RightRotate all layers 90° clockwise
5Mirror HorizontalFlip all layers horizontally
6Mirror VerticalFlip all layers vertically
7InvertInvert the mask (black ↔ white)
8ClearClear the entire mask
9SaveSave the mask and close the editor
10CancelClose without saving
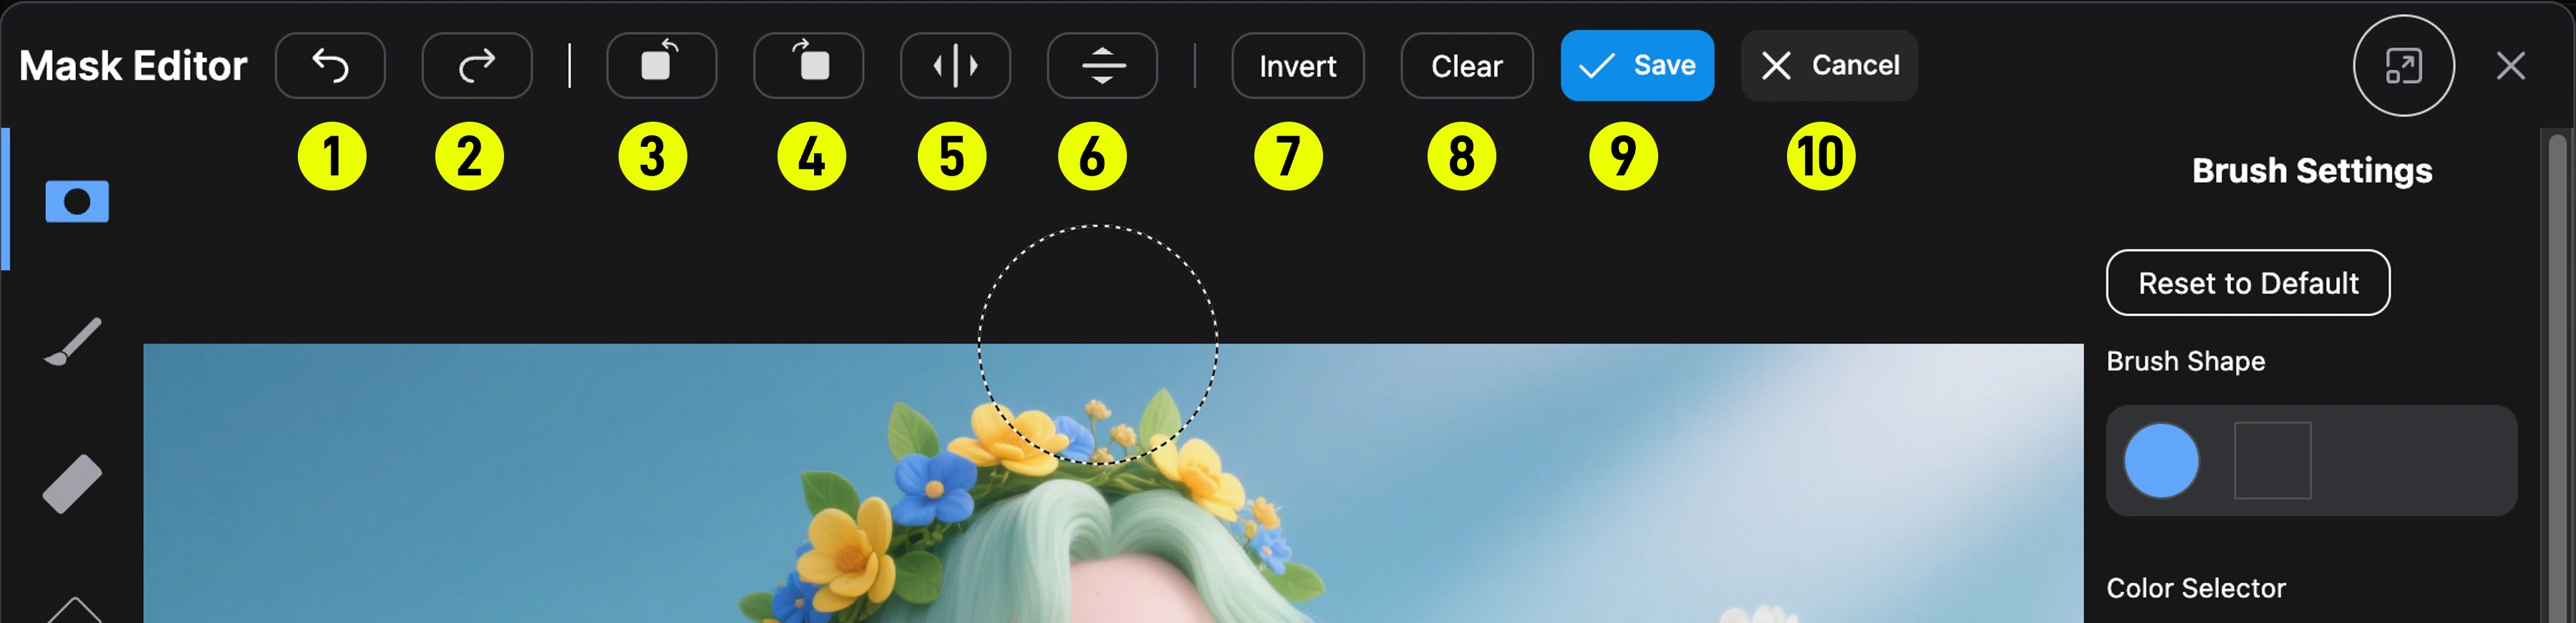
Note: Rotate and mirror operations affect all three layers (mask, paint, and base image) simultaneously. GPU-accelerated textures are recreated after transforms.

Layers

The right panel includes a Layers section where you can toggle visibility of each layer independently:
  • Mask Layer: The mask overlay. You can adjust its opacity and blending mode:
    • Black — Mask renders as black overlay
    • White — Mask renders as white overlay
    • Negative — Inverted mask rendering
  • Paint Layer: The RGB paint layer (visible when using Paint Pen)
  • Base Image Layer: The original source image
Click Activate Layer on a layer to switch drawing focus to it. Refer to the main editor screenshot above — the right panel includes brush settings and the Layers section at the bottom.

Brush Settings

When a brush-based tool (Mask Pen, Paint Pen, or Eraser) is active, the side panel shows brush settings:
SettingRangeDescription
ShapeArc / RectRound brush or square brush
ColorAny hex colorThe paint color (for Paint Pen) or mask color
Thickness1–250Brush diameter in pixels
Opacity0–1Brush stroke transparency
Hardness0–1Edge softness. 1 = hard edge, 0 = very soft
Step Size1–100Spacing between brush dabs. Lower values give smoother strokes
Use Reset to Default to restore the default brush parameters.

Canvas Navigation & Shortcuts

ShortcutAction
Space + DragPan the canvas
Ctrl + ScrollZoom in/out
Click zoom %Reset zoom to 100%
Ctrl + ZUndo
Ctrl + Shift + Z or Ctrl + YRedo
Alt + Right-click + DragAdjust brush: left/right changes size, up/down changes hardness

Settings

In the ComfyUI Settings panel, you can configure the following Mask Editor options:
SettingCategoryDefaultDescription
Brush adjustment speed multiplierMask Editor → Brush Adjustment → Sensitivity1.0 (0.1–2.0)How quickly the brush size and hardness change when using Alt+Right-click drag
Lock brush adjustment to dominant axisMask Editor → Brush Adjustment → Use Dominant AxisOnWhen enabled, the adjustment affects only size OR hardness based on your dominant movement direction

Video Tutorial

Note: This video demonstrates an older version of the Mask Editor (Nodes 1.0 UI) showing brush size adjustment and mask preview creation. The overall workflow remains the same in the current version.